Interesting ideas from colored paper. DIY paper craft for kids. Schemes, templates, instructions. Easy paper crafts for kids
This is perhaps the simplest and least costly type of creativity for children and adults. And probably, there will not be a person who has not launched a paper airplane at least once in his life, and these endless ways to make your liner faster brought so much joy and the first children's victories. In this article, we will look at some interesting crafts that you can easily repeat with your children. Creative activities with paper will be interesting not only for kids, but also for school-age children. Making paper crafts develops fine motor skills, teaches the child to work with scissors, to be neat, patient and attentive.
And all that for children's joy, we need scissors, glue, a couple of sheets of paper, for more advanced users, a couple of colored sheets of paper (cardboard). And you will definitely make your baby happy. In the process of working with very small crumbs, you can remember colors, shapes in a playful way and just have a great time.
Today we would like to offer you some simple techniques that even the smallest can handle to make their own origami.
For the first type of crafts, we need
- Scissors;
- Glue;
- Markers or pens;
- Several sheets of colored paper.
The technique for making such paper crafts is very simple. All we need is to choose our favorite character or animal. Choose the right paper color and get started.
How to make paper craft?
Below, let's take a look at three simple paper crafts: a mouse, a bunny and a bee.
As an example, consider the manufacture of a mouse.
Step 1:
We need to prepare everything necessary for work. To make a mouse, we need to cut out the following elements from paper:
- 1 rectangle (for the body of the mouse). Make the sides of the rectangle pointed, as shown in the example. (this will be the head of the mouse);
- 3 thin strips (this will be the antennae);
- 1 triangle for the spout;
- blanks for the ears 2 larger ovals and 2 smaller ovals, glue them together;
- blanks for the peephole 2 larger ovals in white and 2 smaller ovals in black, glue them together;
- 1 ponytail, cut a slightly twisted strip from paper.
Step 2:
Now that we have all the elements of the mouse, we need to fasten it with glue. We bend our largest rectangle (torso) in half, but do not press it, glue the front part. We are waiting for the glue to set.
Step 3:
We glue all the other elements of the mustache, nose, tail and ears to the finished main part.
Examples of work in a similar technique.


For the second type of crafts, we need
The next type of paper craft is also very easy to make, but very colorful and bright. Such crafts will also look beautiful as bowls for pens and pencils.
- Scissors;
- Glue;
- Markers or pens;
- Cardboard cone.
For example, consider the manufacture of a bee

Step 1:
We need to prepare everything necessary for work. To make a bee, we need to cut out the following elements from paper:
- 1 large rectangle the size of the cone you chose for the craft;
- 3 black stripes;
- blank for wings, make it the same as in the example;
- 1 circle, this will be the face of the bee;
- mustache blanks.
Step 2:
At this stage, we need to take the cone and glue it with a blank of a large rectangle.
Step 3:
While the glue on our cone dries, we can prepare the face of our character. Draw eyes and a smile on the prepared circle, then glue on the antennae.
Step 4:
We continue to work with the cone, glue the stripes characteristic of the bee on it, approximately at the same distance.
Step 5:
We collect our bee, glue all the remaining elements on our cone. The bee is ready.
Examples of work in a similar technique


For the third type of crafts, we need
The third version of crafts is slightly different from the first two. It takes a little more time and patience to make. But these types of paper crafts look very beautiful and stylish. And they are suitable not only for children's creativity, but also for decorating a room and many more different applications.
- Scissors;
- Glue;
- Pencil;
- Several sheets of colored paper;
- Ruler.
As an example, consider the manufacture of a bunny.

Step 1:
We need to prepare everything necessary for work. To make a bunny, we need to cut out the following elements from paper:
- circle, this will be a blank for the face of a bunny;
- 4 oblong ovals for ears (2 a little more, 2 a little less) glue them together to make ears;
Step 2:
We need to make the base of our bunny. We take a sheet of A4 paper, now we need to make something similar to an accordion. So that at the end, our bunny turned out to be even, use a ruler to divide the A4 sheet into even parts. Now, along the marked lines, we bend our leaf into an accordion. To make the bunny bigger and more embossed, you can make several of these harmonicas

Step 3:
The next step in our work is to glue our finished accordions together with glue to make a circle.
Step 4:
Glue the face of our bunny and ready-made ears onto the finished circle. You can make several of these bunnies and fasten them together with a thread and decorate the room with such a cute DIY garland.
Examples of other works performed in a similar technique.


We hope our article was useful for you, leave your comments and send us photos of your work.
Crafts for kids step by step for kids of all ages. The works are grouped based on the popular techniques and materials used.
For crafts, you can use a variety of materials (from familiar and popular to unusual). In addition to paper, plasticine, chenille wire, you can create from foam, cocktail tubes, beads and even pasta. At the same time, their own fantasies, modern techniques, and the achievements of teachers are used.
Crafts for kids: Top 200 ideas step by step
- Study the list of materials necessary for making crafts so that before you start work, prepare everything you need;
- Be careful with sharp objects. It is important to use scissors only for children with rounded tips. If holes are to be made, blunt punches should be used and always under adult supervision.
- It is important to be careful when working with materials. Paints, plasticine can stain the surface, hard objects can scratch it. Therefore, you need to protect the work surface, cover it with oilcloth or put special plastic or wooden planks;
- When using paints, you should change the water more often, and then wash your hands and hands thoroughly. To prevent the paint from drying out, the jar must be closed tightly, like a box of paints.
- After working with clay and plasticine, so that they do not dry out, they are stored wrapped. It is better to wrap clay in a piece of damp cloth, and plasticine in plain paper.
- Pencils should always be well sharpened. You can not use a knife or blade for this. It should be sharpened with a special sharpener.
- Felt pens must be capped so that they are always ready for further work.
Paper crafts for children
Paper is one of the simplest and most affordable, easily processed materials. Many different crafts can be made from it, which, moreover, can find practical applications. Working with paper imperceptibly affects the overall development of the child: his fingers get stronger, sensory impressions increase - at the level of sensations, he recognizes the texture, density and color of paper.
Pencil, ruler, glue, scissors and, of course, colored paper or cardboard - everything you need for exciting creativity. A little skill and patience - and you get a wonderful character from a cartoon, fairy tales, your own fantasies. It can be:


Stripe crafts refer to three-dimensional modeling and paper construction. For crafts, strips of double-sided colored paper, 1 cm wide, are most often used, especially when creating paper balls, the base-body for animals and birds. Also, the stripes can immediately be folded into a certain character, and from small strips glued into a droplet, beautiful voluminous applications are obtained.

Crafts for children from paper accordion
There are two ways to create a paper accordion. Both of them are successfully used in children's creativity for the manufacture of various paper toys and other interesting products.
- The method is simple. Small wrinkles are created on the surface of the paper. A piece of paper is folded forward, then turned over and exactly the same size fold is folded forward again. For convenience, young children can draw parallel stripes on paper in advance.
- Way. They cut off two long strips of paper, glue their ends perpendicularly, and then by weaving they create a small accordion, from which wonderful bodies of animals and birds are obtained.


Crafts for children from cones
Another great base for crafts is a cone. It is easy to make from paper or cardboard. To do this, draw a circle, divide it into sectors. For example, 4 parts. If you cut off one part, the cone will be wide, two - medium, three - narrow. Depending on this or that craft, they make the desired cone, and then, with the help of small details, they complete their personas, their work.

Origami technique
Paper toys, animals, plants, vehicles, birds, various items made using the Japanese origami technique will please anyone to whom they will be presented - parents, close friends.
Origami differs from appliqués, cutouts, and many other forms of art in that it is the art of the whole. You don't need to cut or glue anything, you just need to use one whole sheet of paper. It is allowed to give expressiveness to the craft and individuality by adding some details. For example, eyes, muzzles of animals, patterns on the body, clothes.
More recently, the popular modular origami, which is more difficult for children, consists of several pieces of paper.


And other various ideas that can be found in the section.
Crafts for children from bushings
The core is the remaining roll of thick recycled paper. It is also called a cylinder or a tube. Thanks to the ready-made base shape, strong and stable on the surface, the sleeve can be an excellent base for creating three-dimensional crafts for children. Also, colored paper or cardboard is used in the work, with which the sleeve is wrapped, and additional details are cut out of them. In some crafts, the sleeve is painted with paints and felt-tip pens. In addition to the toilet paper roll, the bases from paper towels, parchment paper and foil are suitable.

Crafts for children from chenille wire
Making and inventing models from wires is no less exciting than folding origami, sculpting from plasticine, and creating from paper. From chenille wire you can make a lot of interesting and funny crafts for friends, parents, useful things for yourself. As a result of work, fantasy develops, children learn patience, perseverance.
It is not necessary to perform crafts in the presented colors. You can take any wire according to your own idea, mood and preference.


Crafts for children from cocktail tubes
There is nothing that can't be done with cocktail straws. They can be woven, the tubes are glued, strung, cut lengthwise to make beautiful flowers, across to make a mosaic and even beads.


Crafts for children from plasticine
Plasticine is a great material for a beginner sculptor! From it you can make real masterpieces that will decorate the house, will be as a toy. From plasticine you can mold many funny things, animals, birds, people, everything that fantasy tells. Plasticine has bright saturated colors and an easy-to-handle form. The very name of this material speaks of its excellent plastic properties.
Modeling classes bring up the artistic taste of the child, the ability to observe, highlight the main, characteristic. They teach not only to look, but also to see, because the characters, objects and plots are literally next to us, they live in books and cartoons. It is only necessary to help the child find them - to find the wonderful, original and interesting in everyday life. And any creative work brings up perseverance, develops skills and abilities.

Plasticine modeling rules:
- Before starting work, you should prepare the workplace and knead the plasticine so that it becomes soft, docile and elastic.
- It is recommended to start making crafts from the main part, the largest, then smaller ones are molded and connected to each other. Small details are created as the character is designed.
- It is most convenient to attach small parts in a stack. It can also easily and accurately make various recesses.
- When constructing crafts from plasticine from separate large parts, it is necessary to press the parts tightly and cover up the bonding point to increase the strength of the product.
- At the end of work, you need to clean the workplace and wash your hands thoroughly with soap and water.


Crafts from plastic and paper plates
From this material you can make a variety of crafts - simple and more complex. In the process of work, creative and spatial thinking, imagination, eye, fine motor skills develop. Also, children learn new visual techniques, learn about the properties of materials and how to use them in creative work. All crafts from plates can be a wonderful interior decoration, a funny toy and even a picture.


Crafts from natural materials
Natural material is a storehouse of ideas and opportunities for the development of children's creativity. Working with it has a great influence on the child's thinking and imagination. There is always a possibility of novelty, creative search, the opportunity to achieve ever more perfect and original results. When walking in a park, forest, you can collect leaves from different trees, acorns, chestnuts, cones, herbs, interesting twigs for further creativity.


Basic rules from the collection and preparation for work:
- Twigs or roots should be washed and dried in a cool, dry place;
- Cones and chestnuts also need to be washed and dried;
- It is recommended to collect cones on moist soil.
- You can only collect fallen leaves. The best harvest time is late summer and early autumn. At this time of the year, the leaves are especially beautiful, varied and colorful;
- Products made from fruits and vegetables can be used for puppet theater, Christmas tree decorations, and even as a gift to loved ones. The main thing is to fasten the parts with safe material so that in the future the products can be eaten. It can be skewers, toothpicks, thick starch glue.

The presented crafts for children use a variety of materials, as well as technological techniques that serve the development of fine motor skills, which means they stimulate the speech and mental activity of children. But the most important task is to teach the child a creative vision. After all, it is this skill that distinguishes a person-creator, a person-creator.
Making various crafts for children with your own hands together with your child is an exciting activity that greatly contributes not only to the development of the child, but also to strengthening your relationship with him. Any child will be very happy if he has the opportunity to do something beautiful with his parents. Therefore, even in the busiest schedule, try to set aside a piece of time to devote it to activities with children. The sections of our article will provide useful recommendations on how to make DIY crafts from various materials, taking into account the age characteristics of children.
DIY paper crafts for children
The most commonly used material for applied art is, of course, paper. Moreover, it is worth paying attention not only to the usual color sets, but also to other types of it: corrugated, velvet, designer. You can create do-it-yourself crafts for children from paper, flat (applications), as well as voluminous, using various techniques. For example, having learned how to fold a flower using the origami technique, form a beautiful bouquet of tulips.


The easiest DIY crafts for beginners
For those who are just starting to teach their child the arts and crafts, we advise you to start with the simplest solutions, making easy crafts for children with your own hands. Perhaps you will like examples of caterpillars made of paper rings, an application of colorful fish, or funny mice on a piece of cheese.


DIY cardboard crafts for children
Cardboard is an easily accessible material that is well cut, bent, painted, it is often used in children's creative works. In addition to a set of cardboard purchased at the store, cardboard boxes, disposable tableware, cereal packaging, egg "honeycombs", and toilet paper sleeves are used. In our photo catalog you will see what kind of cardboard crafts do-it-yourself craftsmen make for children. For example, a stand for pencils, funny animals, boxes.


Craft "house" do it yourself
Cardboard houses are made at will of any size - it all depends on their purpose. Perhaps it will be a large structure with a child's height, a "dwelling" for dolls or a do-it-yourself craft "house" made as a New Year's decoration, gift wrapping. In any case, the manufacturing technology is the same, the differences will be in size and design. We have prepared some sketches on which you can make blanks. If you are making small structures, PVA glue and adhesive tape are enough to hold the parts together. When building a large house, it is better to use a heat gun for reliability. Do-it-yourself New Year's craft "house" is complemented by decor that imitates snow on the roof (cotton wool, foam balls), and gift wrapping must have at least one opening sash, for example, a door, a roof slope.


How to make DIY crafts from fabric
Wonderful do-it-yourself toys are sewn using fabric. Moreover, not only a solid cut, but various shreds, household napkins and even socks. Look at the photo, isn't it, a cute bunny came out of a sock? An older child will do it on his own, and the baby will have to help. Make the necessary cuts and seams, and instruct the child to fill the figure tightly, as well as draw a muzzle.
You can also sew crafts for children with your own hands, which will become not only a decoration, a toy, but also a useful little thing, for example, a large soft ottoman duck, the photo of which is in our catalog, a star pillow.


Children's DIY crafts from felt
Felt is a wonderful comfortable fabric that has a bright palette of colors. It allows you to sew a variety of DIY crafts for children, and then decorate the children's room with them. Household napkins will help replace the fabric (usually they are sold in a set of four colors). Such crafts-toys are sewn with their own hands without the help of a sewing machine, manually.
Children's crafts for the New Year do it yourself
On the eve of the New Year holidays, children's matinees, rooms are decorated everywhere, lush Christmas trees are dressed up. It is quite possible to make a lot of interesting symbolic additions on your own without spending money on purchases. These can be the most original balls for the Christmas tree, garlands, and other decorations that are quite within the power of a child to make.


DIY snowman craft
The snowman is a kind of symbol of winter and, of course, his presence for the New Year's interior will come in handy. The photos of our selection show options for how to make such crafts with your own hands in stages, using foam balls, socks, pompons. A larger figure, decorated with thread, balloons, glue, will suit the kindergarten matinee. Inflate five balloons of different sizes (two of the same size for the handles). Wrap each of them with a thread dipped in glue (PVA is quite suitable). When the blanks are completely dry, the balls need to burst, get it from the inside. Finished balls are fastened together. The do-it-yourself snowman craft is almost ready. It remains to draw eyes (beads, buttons), a mouth from a thread, a nose-carrot (sew from fabric). Traditionally, the head is complemented with a bucket, the neck is decorated with a scarf.


Santa Claus DIY craft
In the New Year's interior, Santa Claus is indispensable. The easiest way is to draw it from thick paper (cardboard). Use a ready-made template, or make a conical shape from a sheet, which you then “dress” using multi-colored paper, shaping your face, beard, and pens. Do-it-yourself similar children's crafts for the New Year are made using fabric (with us you will find examples of patterns), plastic bottles, and other improvised means.


DIY crafts for kindergarten
Various creative works for young children of kindergarten age should be distinguished by simpler techniques and materials. The child is just starting to learn how to make something beautiful on his own, so you need to choose the most simple, but interesting options.


DIY crafts for kindergarten children: applications
The most common way to teach children how to create pictures is through appliqué. Such DIY crafts for kindergarten (photos are presented below) can be designed not only using colored paper, they also take thick fabric, artificial leather, velvet paper, improvised materials (cotton pads, cereals, etc.), natural raw materials (leaves, seeds) . Children of older groups can start voluminous work, for example, make an application in an “aquarium” box with hanging representatives of the water world.


DIY crafts in the garden from natural material
Often, especially in autumn, exhibitions of works are held that demonstrate do-it-yourself crafts for kindergarten from natural components. Chestnuts, acorns, cones, sunflower seeds, pumpkins, colorful autumn foliage - all this provides great ground for the development of children's imagination. To make various figures, the compositions additionally use plasticine, which fastens the parts or forms the base. Pictures of DIY crafts using natural raw materials are presented by our photo selection. Feel free to try using them by making a chestnut caterpillar, a hedgehog, and other patterns.
DIY crafts for school
Schoolwork varies in complexity. If do-it-yourself crafts in elementary school have simple forms, then high school students who have enough skills are able to arrange more complex compositions, for example, a bouquet of roses from maple leaves, a cardboard town or a paper basket with asters.
Do-it-yourself crafts for school, the photos of which are posted below, involve the use of a large selection of raw materials, including all sorts of improvised means (plastic utensils, DVDs, matches, buttons).


Do-it-yourself crafts for schoolchildren with trimming technique
Facing is a rather entertaining creative process that is suitable for children of different ages. It allows you to create "fluffy" pictures that will decorate the room, as well as an original gift to relatives. Crafts in elementary school with their own hands have simplified options until the child acquires certain skills. For example, in this way you can only draw the outlines of the picture.
To make a magnificent appliqué, you will need corrugated paper, scissors, glue, a match or a toothpick with a blunt end, a sketch drawing on cardboard. Before making a craft with your own hands, we cut the paper into small squares (0.5 cm), which we sort by color. Lubricate the sketch with glue. We put the match in the center of the square, turn it (so that the corrugation is fixed on it), then glue the end to the sketch. Thus, we draw up the entire drawing, applying the necessary colors of the corrugated squares.


Learning how to create beauty yourself is the best way to develop the creative abilities of a child. Children's crafts with their own hands greatly develop the imagination, giving the joy of an interesting joint pastime with adults.
DIY crafts for children: a selection of 50 ideas with step-by-step examples updated: May 2, 2018 by: Kyiv Irina
Quick article navigation
Making paper crafts with your own hands is a simple, inexpensive and very interesting activity for both children and parents. All you need is paper, scissors, glue, and a few fun ideas. In this material you will find 7 step-by-step needlework workshops from different types of paper and 50 photo ideas for your inspiration.
Idea 1. Volumetric crafts
We offer the smallest needleworkers to make a simple voluminous paper craft in the form of such a cat.

Materials:
- Sheet of A4 paper;
- Scissors;
- Glue.
Instruction:
- Download and print the template (see cat template below) on white or colored paper;
- Cut out the template with scissors, and then make 4 cuts in it along the outlined solid lines;
- Bend your neck according to the markup with an accordion and twist the tail;
- Bend the fold lines marked with a dotted line on the paws and glue them to the cardboard.
For older children, there is a more difficult task, namely a master class on making voluminous paper crafts in the form of a bird.

Instruction:
Step 1. Download and print the layout diagram (see below). Please note that the file contains a colorless template so that you can print it on colored paper.
Step 2. Cut out all the details exactly along the solid lines with a breadboard knife.
Step 3. Fold all the fold lines according to the principle: bold dotted line = fold inward, thin dotted line = fold outward.
Step 4. Glue the parts to each other, treating their corners with glue (with Glue inscriptions). Stick to the following order:
- First glue the beak to one side of the bird, then to the second.

- Glue the back of the bird starting from the beak, as shown in the photo.

- Glue on the wings.

- Now take the part, which is the bird's breast, and at one end of it, fold and fix the triangle with glue as shown in the photo.


- Assemble the legs, make sure the knees are at a 90 degree angle, then glue the legs to them.

- Well, that's all, it remains only to glue the legs to the body and your voluminous paper craft is ready. If you wish, you can make a whole flock of such birds in different colors with your own hands.


Idea 2. Wall panels, paintings and applications
It is known that you can draw not only with paints on paper, but also ... with paper on paper. Such activities are no less exciting and useful for developing hand-eye coordination, fine motor skills, perseverance, the ability to plan your work, combine colors, shapes and materials.
The following selection of photos presents ideas for paintings, panels and paper applications for children of different levels of complexity.


By the way, the application can be made up of parts of the same shape, but different sizes and colors. It can be circles or hearts. The following slider provides examples of such paper crafts and schemes for their manufacture.


And here are some more examples of interesting paper crafts of various types.

Now we offer you to get acquainted with a master class on making an original, but very easy paper craft. We have no doubt that such cute figurines will help instill in your child an interest in reading books.


Materials:
- 1 sheet of A4 color paper;
- 1 sheet of A4 white paper;
- Scissors;
- Glue stick;
- Markers, pencils and paints.
Instruction:
Step 1. Bend one half of a white A4 sheet in half and let the child independently draw the cover of their favorite book on it, also signing the title and name of the author.
Step 2. Cut three long strips from a colored sheet about 2.5 cm wide. You will have 4 parts: 2 strips for the legs, 1 strip for two arms and one rectangle to create the torso of the figure.

Step 3. Take two strips (for the legs), fold them like an accordion, and then glue them to the rectangle torso.
Step 4. Divide the remaining long strip into two equal parts, draw fingers at the ends and glue to the body.
Step 5 Bend the top of the figure to the front side and make her bangs with scissors as shown in the photo.

Step 6. From the remaining half of the white sheet, cut out circles and glue on the figure as if it were glasses.
Step 7. Draw the details: eyes, mouth, nose and temples of glasses with a black marker.
Step 8. Now glue the book to the hands of the figurine and finally put it on the table or hang it on the wall, for example, near the bookshelf.

Idea 3. Hats
All children love games with reincarnations and for this they use everything that comes to hand. To provide a child with props, you can make fantasy hats with him. By the way, such colored paper crafts can be made for one or more children for a performance, a masquerade, a themed birthday or any costume party. In the next selection of photos you can see examples of a variety of paper "hats" - from pirate cocked hats to wigs.


Today we invite you and your kid to make a hat in the shape of a dinosaur head. This workshop is so easy that a child as young as 3 years old will need very little help from you.

Materials:
- 3 sheets of colored paper;
- Glue stick or PVA;
- Scotch;
- Scissors.
Instruction:
Step 1 Cut 4 strips about 3 cm wide along the long side of the paper. Two of these strips will turn into a headband, and the other two into the crossbars of the “cap”, on which dinosaur spikes will be glued.

Step 2 Take two other sheets of paper and cut them into strips about 5 cm wide along the short side of the paper. You can measure and cut the strips by eye, but in the end you should get 5 strips from each sheet. We need these blanks for the manufacture of spikes.

Step 3. Fold each spike blank in half and, stepping back from the fold by about 1.5 cm, draw a markup in the form of a triangle up to the very edge (see photo). Next, just cut out future spikes.

Step 4. Glue the two crossbars, and then glue the spikes on them in a row as shown in the photo below.

Step 5. While the glue dries, fit the two pieces of the headband to fit the circumference of your child's head, and then connect them in a circle with tape.
STEP 6 Now let's get back to the spikes. Turn the crossbar over so that the spikes are on the table and carefully bend each of them (see photo). Form the first spike: cover one side of it with glue and connect it to the other. Use paper clips to secure the spike until the glue dries. Repeat these steps with the rest of the spikes.

Step 7 After the glue has dried, remove the staples from the spikes and simply glue the crosspiece to the headband at the front and back.

Idea 4. Toy figures from a toilet paper sleeve
Toilet paper rolls are great crafts for kids that just need a little embellishment. For example, you can make such wonderful toys out of them.


Time inexorably runs forward and now white flies are flying outside the window, slowly sinking to the ground and covering everything around with a snow-white fluffy veil. However, despite the cold, the soul is warm and joyful. And all because suddenly appeared snowflakes herald the onset of the New Year. The most important holiday of the year is already very close, which means it's time to think about New Year's decor, gifts and, of course, crafts.
The days are getting shorter and the evenings are getting colder and longer. What to do with yourself, and even more so with your little fidgets, when it is already too dark for outdoor winter fun? Well, crafts, of course. New Year's crafts can be made from the most unexpected materials: cocktail tubes and much more. But there are also more traditional materials, such as paper. In this article, we have collected for you more than 60 step-by-step master classes for making paper crafts for the New Year. If you still think that only applications can be made from paper, then drop everything and carefully look at our article! Well, for those who are looking for something unusual and know what miracles can be created from plain paper, we can only advise you to start the process of creating New Year's paper crafts according to our schemes and templates without delay.
One of the simplest New Year's paper crafts can rightly be considered a garland. We all remember well from our childhood how they decorated the Christmas tree with such paper garlands not only at home, but at school or kindergarten. A paper garland is made very simply: colored paper is cut into strips of the same width, the first strip is glued into a ring, and each subsequent one is threaded into the previous ring and also glued. This paper craft is perfect for 4-5 year olds.
If the task of entertaining children is not worth it, but you need to decorate the house, then here's another version of a paper garland for your note. It is made even easier than the previous one, but you will need a sewing machine. So, to create such a New Year's paper craft, you will need: a lot of circles of different diameters (the number depends on the size of the garland), a sewing machine. Sew circles through the center on a typewriter and hang a garland. From any gust of air, such a garland will “come to life”.

So, if you decide that the issue with garlands is closed and there is nothing else to think of here, we hasten to upset you - this is only the very tip of the iceberg. Simple paper garlands are an activity for beginners. Professionals prefer more complex tasks, such as voluminous paper crafts. Below is a master class on making a volumetric garland in the form of light bulbs.

By the way, you can decorate an ordinary LED garland with paper lanterns. This New Year's paper craft looks very cool, especially if you decorate the wall with this garland.

Interested in a garland? Then see more ideas:

New Year is the most beloved holiday associated with miracles and magic. The celebration of the new year is characterized by folk festivals and joyful meetings. It is impossible not to love this time of the year, when everything around is transformed, and every house or shop window becomes like scenery for a fairy tale. Everyone wants to participate in this transformation, and therefore they try to decorate their homes […]
Since we are talking about the decor of the apartment, it would be strange not to mention Christmas wreaths, or as they are also called New Year's wreaths. Everyone can make such a paper craft, in addition, a New Year's paper wreath is a reusable decoration that will not deteriorate and will not lose its appearance over time.

A very cool paper craft for the New Year is a wreath of roses. You will have to work hard to create such a craft, so if you decide to make yourself such a paper wreath on the door - stock up on patience and mood!

If you're planning a New Year's themed party, say Cuban or Hawaiian style, then you'll definitely need some kind of decoration to set the atmosphere. Here is such a simple, but very original wreath made of paper will come in handy!

Surely your child at school or in the garden was asked to make a Christmas wreath with their parents. Allegedly for a competition, but the main task of this task is to get parents to spend time with their children. But maybe you should not wait for a task from school, but spend time with your child yourself. In addition, with such a New Year's craft, you can decorate the house in a very original way, and most importantly, get a lot of positive emotions!

Need a Christmas wreath? See more ideas:

Preparing for the New Year is sometimes even more pleasant than the celebration itself. The whole family, including the youngest residents, can take part in the process of decorating the interior. You can decorate an apartment or house for the New Year holidays in a variety of ways, but recently New Year's wreaths, which are better known to us from romantic Hollywood Christmas films, have been very popular. However, trendy […]
So, we continue to decorate the apartment. There is a garland, there is a wreath. Something is missing? Oh, of course, Christmas trees! If you prefer to put a big forest beauty on New Year's holidays, it doesn't matter. By the way, read on. Small paper Christmas trees make a great addition to the decor, and they can also be used as small souvenirs for guests!

# 10 New Year's paper crafts with our own hands: we make a Christmas tree toy "Herringbone"
A Christmas tree made of paper does not have to be on the table or somewhere in the house. You can make a craft out of paper, which you can then hang on the Christmas tree itself, and if there is no Christmas tree, then you can simply hang such voluminous paper Christmas trees around the house. The scheme for making a Christmas tree is quite simple, but if you don’t quite understand what the essence is, or you just don’t have time to figure it out, then you can download a ready-made template.

A very cute Christmas tree can be made from corrugated paper. This paper craft looks very realistic, but it is done quickly and easily.

If you are still interested in a paper Christmas tree, but you want to make something unusual, then use this master class.

The tree does not have to be on the floor, it can also be hung from the ceiling. An excellent Christmas garland will turn out from plain paper.

How to distinguish the New Year's table from the usual festive one? Everything is correct! According to thematic elements of decor. And how to make a suitable New Year's dessert, see.


Do you want more workshops on making paper Christmas trees? See:

The Christmas tree is, of course, the main attribute of the most important winter holiday. It will not be possible to do without the forest beauty, the atmosphere is not the same, and where does the good grandfather put the gifts? It so happened that a Christmas tree is decorated in the house for the New Year holidays: someone puts a live one, someone prefers an artificial one, and someone paper. A paper Christmas tree can not only replace a Christmas tree […]
#17 Christmas paper crafts: making a movable card with wishes
From paper, you can make not only flat or voluminous crafts, but also movable ones. With our ready-made scheme, you can make a postcard with an encrypted congratulation or message. Such an unusual gift will please not only children, but also adults! You can download the finished scheme below.


In winter, wild flowers are not to be found, even in flower shops. But there is nothing to worry about, flowers can be made from paper with your own hands. And our step-by-step master class will help you with this.

A wide variety of flowers can be made from paper, the whole secret is cutting out the ends.


If you want to make a big Christmas star for decorating a wall from paper tubes, then this master class is especially for you!

A very themed New Year craft made of crimped paper. Such a paper cone looks very natural and is quite difficult to distinguish, especially if it is used as a decor. With our master class, you can easily cope with such paper crafts.

There is another technique for creating paper cones with your own hands. This method is more labor intensive and will take you more time. In addition, to create such a New Year's craft, you will need: paper, a foam blank, a lot of safety pins, a ribbon and beads for decoration. However, if you have the time and desire, then pay special attention to this scheme for making a cone, especially if you want to impress.

From paper, you can make very special crafts using the Japanese origami technique. Our step-by-step master class will help you create a New Year's paper ball that can be used to decorate both a room and a Christmas tree.

A step-by-step diagram for creating an origami star with your own hands. You can decorate the top of the Christmas tree with such a star, you can simply create a festive atmosphere in the house, or you can combine it into one big garland.

You can make the base yourself, as in the first picture. Or you can download the finished pentagon blank and, depending on the size of the pentagon, the size of the finished star will change.


At your service is a step-by-step scheme for making a three-dimensional paper snowflake. Follow the instructions and you will definitely get such a miracle.

#34 We decorate the apartment with cones: do-it-yourself Christmas paper crafts
In continuation of New Year's paper crafts, I would like to offer you another scheme for making paper cones. In addition to paper circles, you will need an oval or round blank, glue and fir branches for decoration.

Another great option for decorating an apartment with your own hands is a large voluminous snowflake on the wall. A snowflake can be not one, but a whole ensemble. In addition, on such a New Year's background, you will get great photos!

New Year's gift must be in a beautiful package. In my opinion, the gift itself is not so much important as the intrigue around it. After all, it is this intrigue that will remain in the memory, this is a pleasant expectation and unfolding the paper. Use our scheme for making paper flowers with your own hands and decorate gifts for dear and close people.

It is customary to decorate a Christmas tree with toys, but these toys do not have to be purchased. Even better if they are made by hand. And what could be easier than making a Christmas tree toy out of paper. Use our step-by-step instructions and make your own paper Christmas ball.

Very simple, but incredibly cute voluminous lanterns can be made from ordinary colored paper. Even children can handle this craft, so feel free to get to work if you have little helpers. Well, if not, then you can do it yourself!

You can make completely unexpected crafts out of paper, including gift boxes. And not just boxes, but in the form of delicious sweets. For such a gift box you will need: cardboard cylinder, colored paper, glue, scissors, satin ribbon.

In continuation of the question of gift wrapping, we want to offer you another budget, but very charming option. You can make such a gift elf with your own hands using our master class.

Here is another version of the original packaging of a New Year's gift with your own hands.

Need more gift wrapping ideas? See:

On the eve of the New Year holidays, shop windows are full of gift boxes, decorative bags, wrapping paper for every taste. Smiling sellers helpfully offer to provide services for wrapping New Year's gifts. And all this seems to be great, because you must admit, it is much more pleasant to receive a New Year's trifle in a beautiful package. But on the other hand, the whole meaning of the gift is lost, the very gift that […]


Want more Christmas ball ideas? See:

Today, on the shelves of stores you can find a huge number of a wide variety of Christmas toys, so turning an ordinary Christmas tree into a real festive beauty is not difficult. However, the New Year is a special day! The day when the old year is left behind, and new adventures, new events, new victories await. But after all, the old year did not pass without a trace, […]


#55 A simple paper snowflake pattern: decorating a room for a party

#56 Do-it-yourself voluminous paper crafts: making a snowflake. Scheme


#58 Christmas paper crafts: decorate the house with diamond crystals
Download ready-made schemes and make your own paper diamond crystals.

#59 New Year craft paper ball "Mistletoe" with your own hands
Here you can make such a mistletoe paper ball with your own hands, using ready-made cutting templates. Stock up on patience and New Year's mood!


You can decorate a house not only with standard snowflakes or stars. You can make such a wonderful vase out of paper. Download the finished scheme and assemble the vase following the instructions in the master class.

A wide variety of decorative elements can be made from plain paper, just download the finished scheme, print it, cut it out and glue it. A wonderful Christmas paper craft is ready!

#64 Christmas patterns for cutting: a great photo shoot for the new year
Note! The templates are very large and of good quality, so the download may take some time.

Simple Christmas decorations can be made from paper. In our master class, an example with a ball is given, but it can be other shapes: hearts, stars, Christmas trees and much more. You can download ready-made templates below.

You can make a simple and original Chinese lantern with your own hands using our ready-made scheme.

An excellent decoration for the new year will be a composite paper star. You can download a ready-made template for gluing below.

In our time, you will not surprise anyone with ordinary paper cutters. Volumetric crafts cause much more delight. In this master class, a scheme for creating a simple volumetric star is described step by step. You can download a ready-made template with a large, medium and small star from the link below.

It is quite difficult to imagine a New Year's decor without all sorts of variations on the theme of stars. In this master class, you will learn how to make a volumetric double-sided star out of paper with your own hands. You can download the finished scheme below.

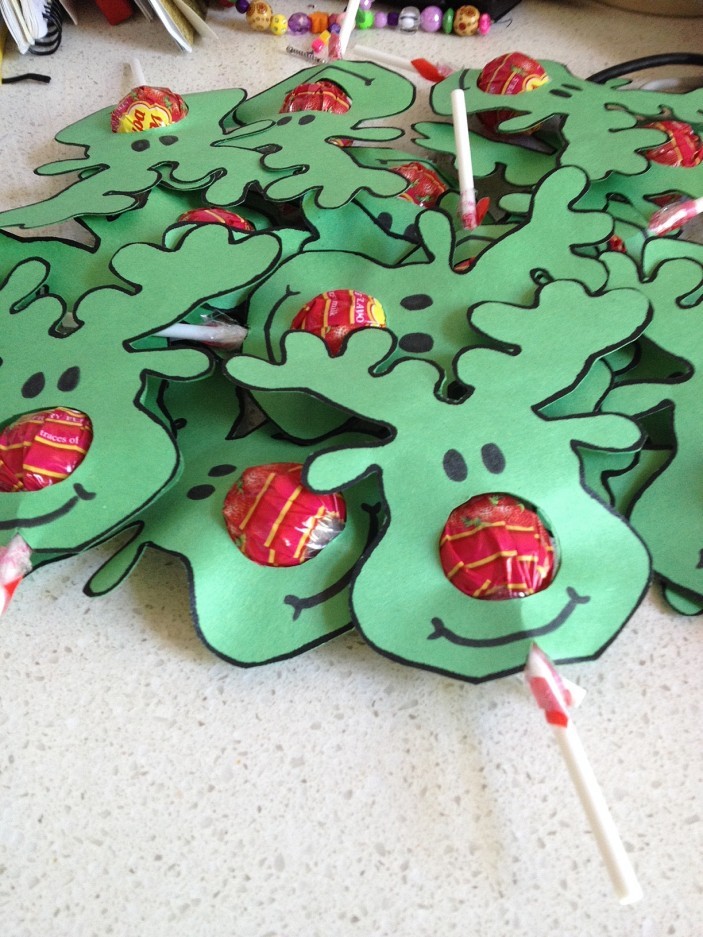
#70 Christmas paper masks
Carnival masks must be included in the list of New Year's paper crafts. Well, what New Year's party can do without masks? That's right, none! In fact, there are a lot of options for making paper masks, and if you turn on your imagination, you can make many wonderful crafts!


")


- What was taught to women who became guards in concentration camps Torture used by the Nazis
- Singer Alex Malinovsky: biography, career, personal life, photo Let's start the story again
- Do I need to shave the testicles and how to do it right at home How to shave the eggs
- Chinese girls with small breasts
- Famous girls with small breasts
- Shoulder girdle: why you can’t sympathize with Russian truckers
- How to clean your computer from junk and speed up its work
- Wedding predictions for guests: funny and funny ideas Comic fortune-telling of a gypsy in prose
- Business on coffee grounds or how to open a mobile coffee shop on wheels?
- Congratulation of a gypsy on a woman's anniversary
- Define the concepts: choir, vocal ensemble, trio, duet, solo
- Guy's Room Design: Ideas and Examples
- General rules for drawing up a foundation plan House foundation drawings
- modern art deco bedroom small art deco bedroom
- Pansies: characteristics and photos of flowers
- Making an art deco bedroom: the choice of materials Beige art deco bedroom
- Bedroom interiors in art deco style Bedroom art deco style beige
- Young: planting and care in the open field Young planting and care in the open
- Varieties for open ground
- Pansies: cultivation and care in the open field